
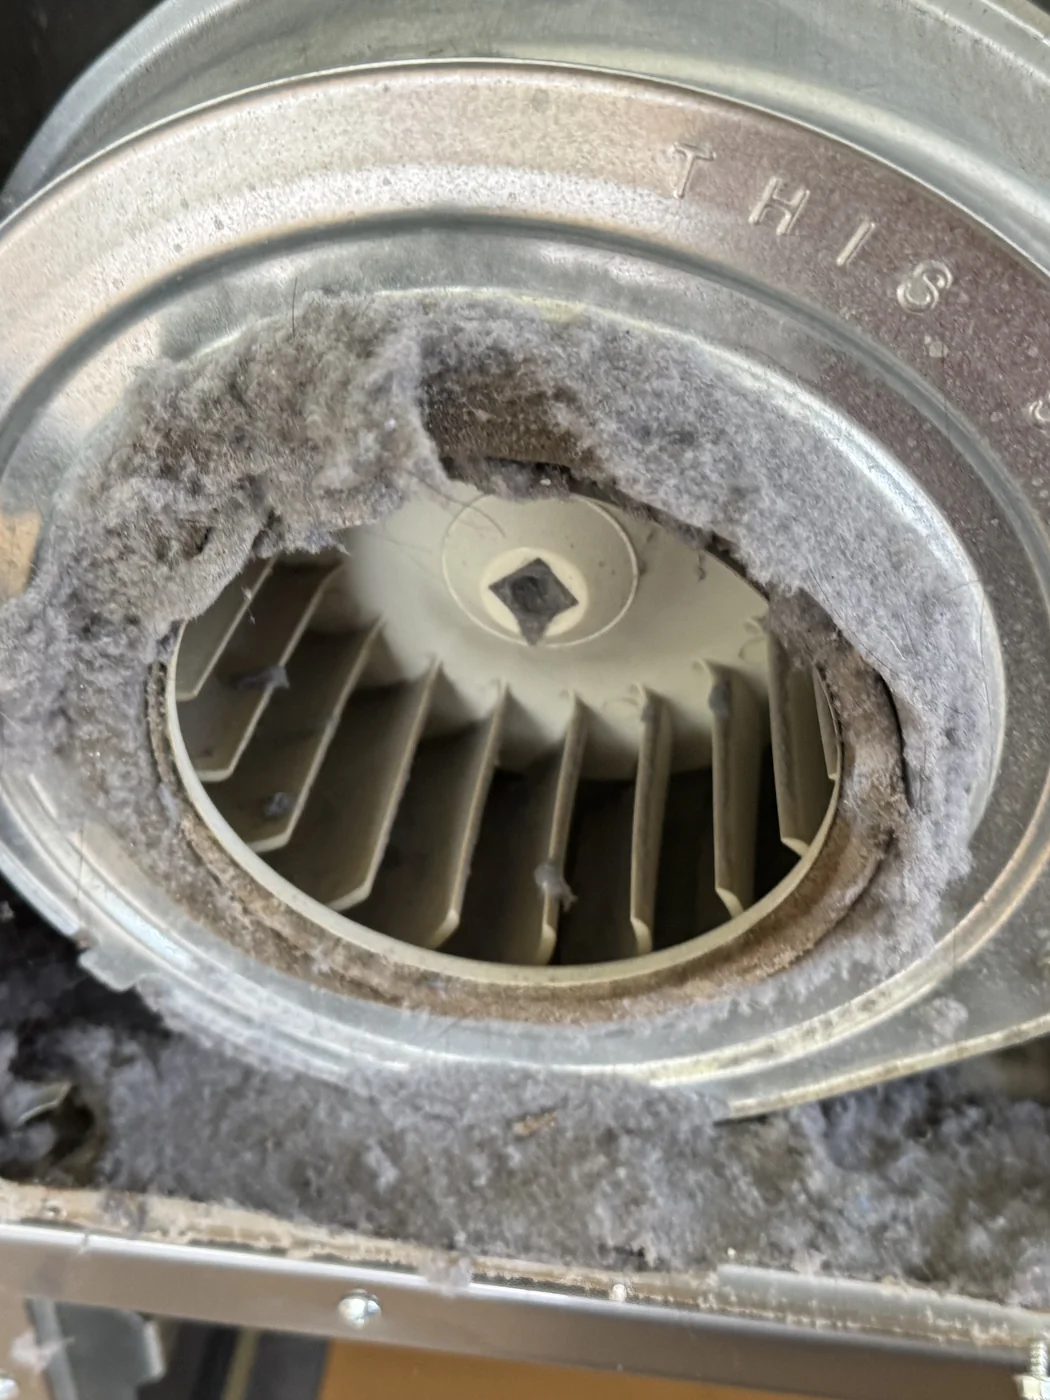
Before you touch anything beyond the lint filter, unplug the dryer or switch off its breaker. Electric dryers run on 240 volts, and never test or probe wiring with the power on. If you have a gas dryer, leave the burner assembly, gas valve, and gas lines completely alone — those are professional-only. If you ever smell gas, don't flip any switches; shut off the gas valve if you can reach it safely, leave the house, and call the gas company. And since laundry rooms put water and electricity side by side, work with dry hands on a dry floor.
1. Blown thermal fuse
The thermal fuse is a one-time safety device that cuts power to the heat circuit if the dryer overheats. On most models the drum keeps turning while the air goes cold — exactly the symptom you're seeing. Here's the part most people miss: the fuse almost never blows on its own. It blows because restricted airflow, usually a lint-clogged vent, let heat build up inside the cabinet. A blown fuse can't be reset, only replaced, and if the airflow problem isn't fixed at the same time, the new fuse blows too.
DIY checks: Clean the lint filter, then pull the dryer out and make sure the duct behind it isn't crushed or kinked. Run the dryer and check the vent hood outside — you should feel strong, steady airflow. Weak or no airflow means the vent is clogged, and that's what killed the fuse.
When to call a pro: Confirming a blown fuse requires continuity testing with a multimeter, with the dryer unplugged and panels removed. We test the fuse, replace it, and clear the airflow restriction that caused it — replacing the fuse alone just resets the clock on the next failure.
2. Clogged exhaust vent
Drying is really about moving moisture out, not just making heat. If the exhaust duct is packed with lint, the damp air has nowhere to go — it recirculates in the drum, cycles run long, and clothes come out damp even when the heater works fine. A blocked vent also traps heat, which is what blows thermal fuses and, in the worst case, starts lint fires. If your dryer has been taking two cycles to finish a load, this is the first suspect.
DIY checks: Clean the lint screen every load, vacuum what you can reach at both ends of the duct, and check the outside hood while the dryer runs — warm air should push out with real force and the flap should swing open freely.
When to call a pro: Full-length vent cleaning, especially runs through walls, ceilings, or the roof. If the vent has already blown a thermal fuse, we handle both in one visit so the fix actually holds.
3. Burned-out heating element (electric dryers)
In an electric dryer, a coiled wire element glows red-hot and the blower pushes air across it. Those coils have a finite life — they weaken with age, and running the dryer with poor airflow overheats them and shortens it further. When a coil finally breaks, the circuit opens and the dryer blows room-temperature air while everything else works normally.
DIY checks: Confirm the air is truly cold mid-cycle, not just cool at the end when the dryer winds down. Check the breaker (see cause 5). That's the honest limit — the element sits behind panels next to 240-volt connections.
When to call a pro: Diagnosing an element means unplugging the dryer, opening the cabinet, and meter-testing the element and the fuses and thermostats around it, since several failed parts produce the same cold-air symptom. We test the whole heat circuit and replace only what's actually dead.
4. Igniter or gas valve coils (gas dryers)
A gas dryer lights its burner in a sequence: the igniter glows, the gas valve coils open the valve, and the flame catches. If the igniter is cracked or weak, the burner never lights. If the valve coils have failed — a very common failure — you get the classic pattern where the igniter glows brightly, then simply goes dark without a flame, over and over. Either way the drum spins and the air stays cold.
DIY checks: Two safe checks only: make sure the gas shutoff valve on the dryer's supply line is open (handle parallel to the pipe), and confirm other gas appliances in the house work, which rules out a supply problem. Do not open the burner compartment or disconnect anything carrying gas.
When to call a pro: Everything involving the burner, igniter, valve coils, or gas connections is strictly professional work — a small mistake risks a gas leak. This is one repair we'd genuinely rather you not attempt, and it's a fast, routine fix for a technician.
5. Half power: one tripped breaker leg (electric dryers)
An electric dryer runs on 240 volts delivered across two linked breaker legs. The motor and controls only need 120 volts, but the heating element needs both legs. If one leg trips — or the breaker wears out internally — the dryer tumbles and sounds perfectly normal while producing zero heat. It's one of the most common and cheapest-to-rule-out causes on this list, and a partially tripped double breaker can look completely normal at a glance.
DIY checks: Find the dryer's double breaker and flip it fully OFF, then firmly back ON — don't just look at it, because a tripped leg often doesn't move the handle. Then run a timed dry cycle and check for heat after a few minutes.
When to call a pro: If the breaker trips again, feels hot, or you notice a burnt smell at the outlet, stop using the dryer. Repeated tripping, cord replacement, and terminal block repairs involve live 240-volt circuits — that's work for us or an electrician, never a DIY test.
6. Faulty cycling thermostat
The cycling thermostat is the dryer's temperature regulator — it switches the element or burner on and off to hold the drum at the right heat. If it fails stuck open, it never allows the heat circuit to close, and you get an endless cold tumble. A failed high-limit thermostat produces the same result. From the outside, this looks identical to a blown fuse or dead element, which is why guessing at parts gets expensive.
DIY checks: Before assuming a failed part, check the cycle setting — "air fluff," "air dry," and some eco cycles run with no heat by design, and a bumped dial causes more service calls than you'd think. Beyond that, thermostats can only be diagnosed by meter testing with the machine unplugged.
When to call a pro: A failed thermostat looks exactly like a good one, so we test every component in the heat circuit in sequence — fuse, thermostats, element or igniter — and replace the one that's actually broken, backed by our 90-day repair warranty.